his is the third in a series of four articles about exposure by Andrew S Gibson – author of Understanding Exposure: Perfect Exposure on your EOS camera. You can read the first lesson, which explored the reasons for using program, aperture priority and shutter priority modes, and the second lesson, which explained why your camera’s meter gets exposure wrong.
In my last article I looked at the fundamental reason why your camera’s meter sometimes gets exposure wrong. Camera meters measure reflected light, and will give an incorrect exposure reading if the subject is lighter or darker than average (you can read the article again for a full recap).
But there’s another reason why your camera’s meter may get the exposure wrong – and it’s to do with the metering modes that your camera has. Most cameras have several exposure modes (my Canon camera has four). Each exposure mode is designed with for a different purpose, and works a specific way. If you are struggling with exposure, it may be because you don’t fully understand the way the metering mode that you are using works.
Most digital SLRs have the following exposure modes:
Centre-Weighted Metering
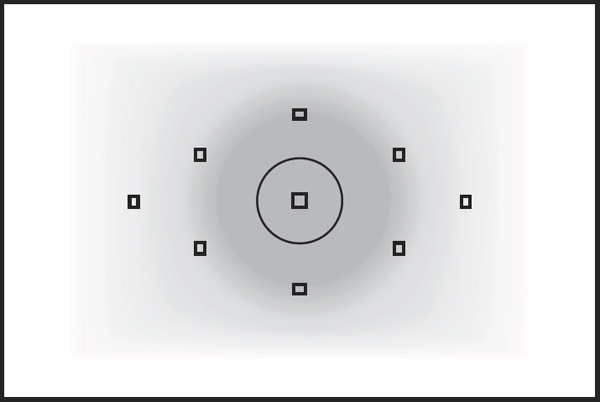
This mode weights exposure towards the centre of the viewfinder, as per the diagram above.
Centre-weighted metering works well if your subject is in the centre of the frame. If not, you have to point the centre of the viewfinder at your subject, hold the shutter button half-way down to lock in the exposure, then reframe.
Centre-weighted metering has been around a long time – if you own an old film camera it may be the only metering mode that it has. It’s predictable and easy to use once you understand that the camera is metering from the centre of the viewfinder.
Spot Metering
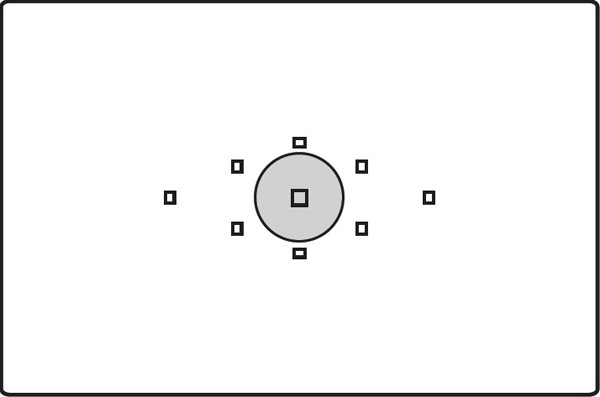
The camera takes an exposure reading from a circle in the centre of your viewfinder. The diagram above shows the spot metering circle in the viewfinder of the EOS 5D Mark II.
Spot metering takes practise. Remember in the last lesson we learnt that cameras measure reflected light, and that the camera is expecting the tones within the area that it meters to average out to mid-grey? If you point the spot metering circle at a tone that is lighter or darker than mid-grey, the camera will give you an incorrect exposure reading.
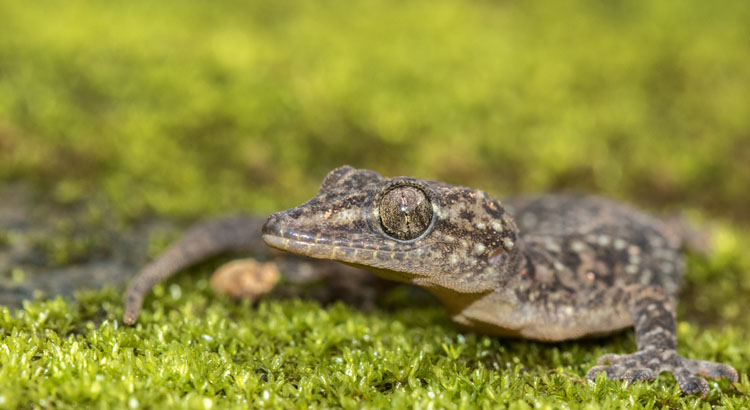
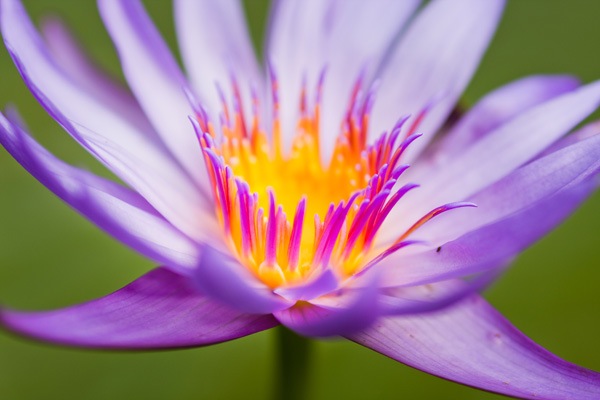
One way to use the camera’s spot meter is to point it at something in the scene that is mid-grey in tone. Grass is a good example, and one approach to metering is to simply use the spot meter and take a reading off any grass or greenery in the scene.
Another technique is to use an 18% grey card (you can buy these from photo retailers). I’ve seen these used by portrait photographers. They ask the subject to hold the card up, take a reading from the card, then put it away, set the camera to manual mode and use those settings. They only need to re-meter if the light changes.
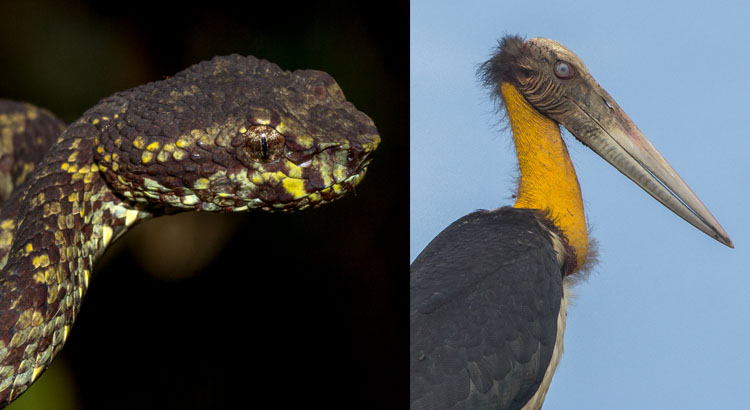
Another situation where spot metering comes in handy is when you have a bright subject against a dark background. This can happen during a theatre performance or a concert. You can take a reading from the subject and the camera will ignore the background.
Partial metering
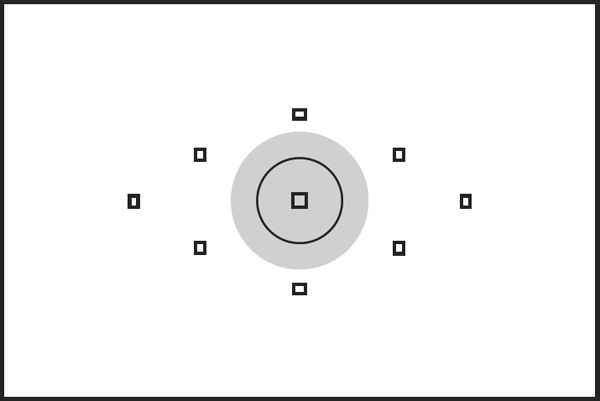
Works just like spot metering but with a larger circle. Like spot metering, it works well for metering brightly lit subjects against dark backgrounds. You can use partial metering for taking a reading from a larger part of the subject than the spot meter.
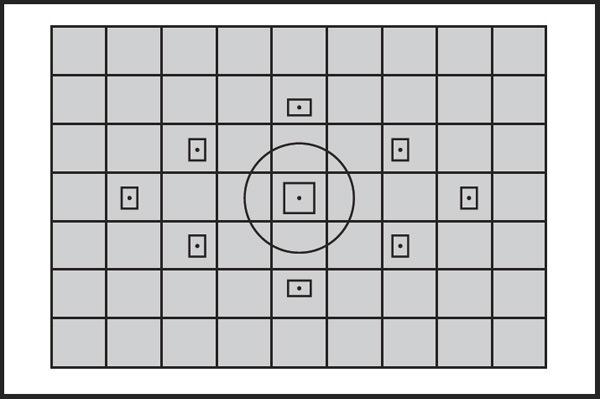
Evaluative Metering
Note: Evaluative metering is Canon’s term and the one that I’ll use in this article. Nikon uses matrix metering and Pentax and Sony use multi-segment metering.
Centre-weighted, spot and partial metering all take an exposure reading from the centre of the frame. Given that most photographers prefer to place the main subject off-centre for compositional reasons, this means that taking an exposure reading with one of these modes is not always the easiest way to work.
Evaluative metering was developed by the camera manufacturers to make it easier to measure exposure with off-centre subjects. The camera divides the viewfinder up into zones and compares exposure readings from each zone to come up with a suggested exposure setting. The above diagram shows the way the viewfinder is divided up into 63 zones on some EOS cameras.
The camera weights the exposure reading towards the active autofocus point (or points) as they are likely to be covering the main subject. It takes into account the readings from nearby zones and analyses the contrast of the scene to come up with an exposure setting.
Each camera manufacturer uses a slightly different process in their evaluative metering modes. While the manufacturers don’t release precise details of how their cameras calculate exposure in evaluative metering mode, there will be a guide in the instruction manual. It’s well worth a read so you understand how it works on your camera.
My preferred way of working is to use evaluative metering, take a photo, look at the histogram and then adjust the exposure if necessary. For me, this is the simplest way of arriving at the optimum exposure. However, everybody works differently and once you understand how the other metering modes on your camera work you may find one of the others is best for you.
Exposure Compensation
Now that you understand more about your camera’s exposure modes, and why they may get the exposure wrong, you need to know what to do when the exposure is incorrect.
If you are using an automatic exposure mode, the easiest way is to use your camera’s exposure compensation function.

If you’re unsure how to set exposure compensation then check your camera’s manual – each camera is different. On mine, I just turn the Quick Control dial (circled above) on the back of the camera with my thumb. I like this way of working because I can dial in exposure compensation while looking through the viewfinder.
If the photo is underexposed, use exposure compensation to increase the exposure by a stop or two. Then check the histogram to see if the exposure is correct (if you’re unsure how to read the histogram, then read this excellent article).
If the photo is overexposed, you can use exposure compensation to reduce the exposure.
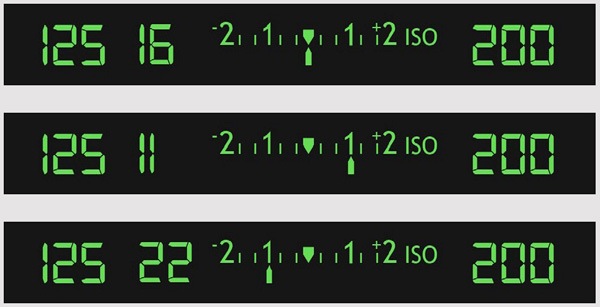
The amount of exposure compensation applied should be displayed in the viewfinder. Again, check your manual. On my Canon cameras the display looks something like the diagrams above. The top display shows zero exposure compensation, the middle display shows +1 stop exposure compensation and the bottom display -1 stop exposure compensation.
Source: http://digital-photography-school.com/exploring-metering-modes/